Replacing the Rollers in a Sliding Door Made by Great Lakes Window
This tutorial is intended to aid in replacing original tank-tread rollers in Great Lakes Window vinyl sliding patio doors due to ordinary wear and tear. Original tank-tread-style rollers are no longer available and must be replaced with aluminum tandem roller assemblies. This replacement requires slight modification to bottom of door.
Note: There is a video version of this tutorial available here: How to Replace the Rollers in a Great Lakes Window Sliding Door
Products Used:
Part being replaced: Part #13010
Replacement: Part #13011
Remove Door
- On vertical edge of sliding panel (edge without latch), pop out lower end of interlock trim piece.
- With help of a partner, lift sliding panel up, tip bottom out of tracks and move door to a table so bottom of door is easily accessible.
Remove Old Rollers
- Pull on inside trolley so it extends out of main roller cartridge. Screw cannot be accessed and removed if inside trolley is not extended.
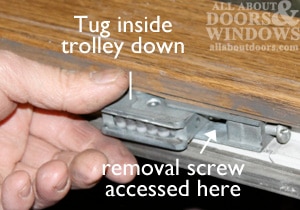
- Unscrew roller assembly from bottom of door.
Modify Door to Acccomodate New Rollers
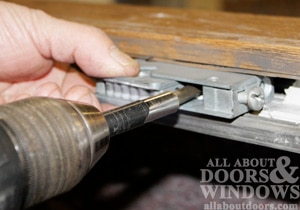
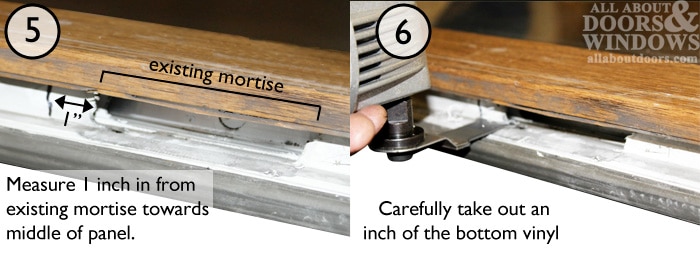
- New rollers take up more room on bottom of door than original rollers. This requires removal of about an inch of vinyl in mortise groove on bottom door edge. Measure and mark one inch towards middle of door from existing roller mortise.
- Using a fine tool, carefully remove marked inch of vinyl from bottom of door. This will allow wheels room to move.
- While new rollers are wider than originals, they are less deep, and if inserted clear into existing mortise, rollers will clear bottom of door. In order to ensure that rollers are in proper position, a shim needs to be installed. A 1/4" thick x 3" long aluminum spacer bar / shim with center screw hole comes with part #13011 replacement kit. A block of wood cut to same size could work if needed.
- Insert shim into mortise, lining up screw hole with screw hole in mortise.
Install New Rollers
- Insert new roller assembly so adjustment screw is on side closest to edge of panel. Line up installation screw hole with holes on shim and mortise. Screw in place.
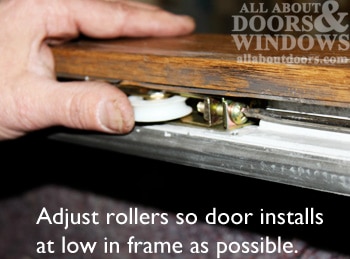
- When both roller assemblies are installed, use screwdriver to raise roller assembly wheels up into door frame by turning screw counter-clockwise (as if lowering door panel). Objective is to make door fit in frame as loosely as possible upon installation.
- Re-install sliding door panel in door frame with help of a partner. Replace lower end of interlock trim piece.
- With partner helping lift door up within frame to take weight off rollers, use screwdriver to adjust rollers clockwise to raise the door within the frame.
Note: this step involves getting down on floor and using long screwdriver to reach in through channel. Picture of cross-section of bottom panel shows location of screw.