

Active Pella / G-U 3-point Multipoint Lock Kit w/ Shootbolts 50/92 - Choose Finish
Details
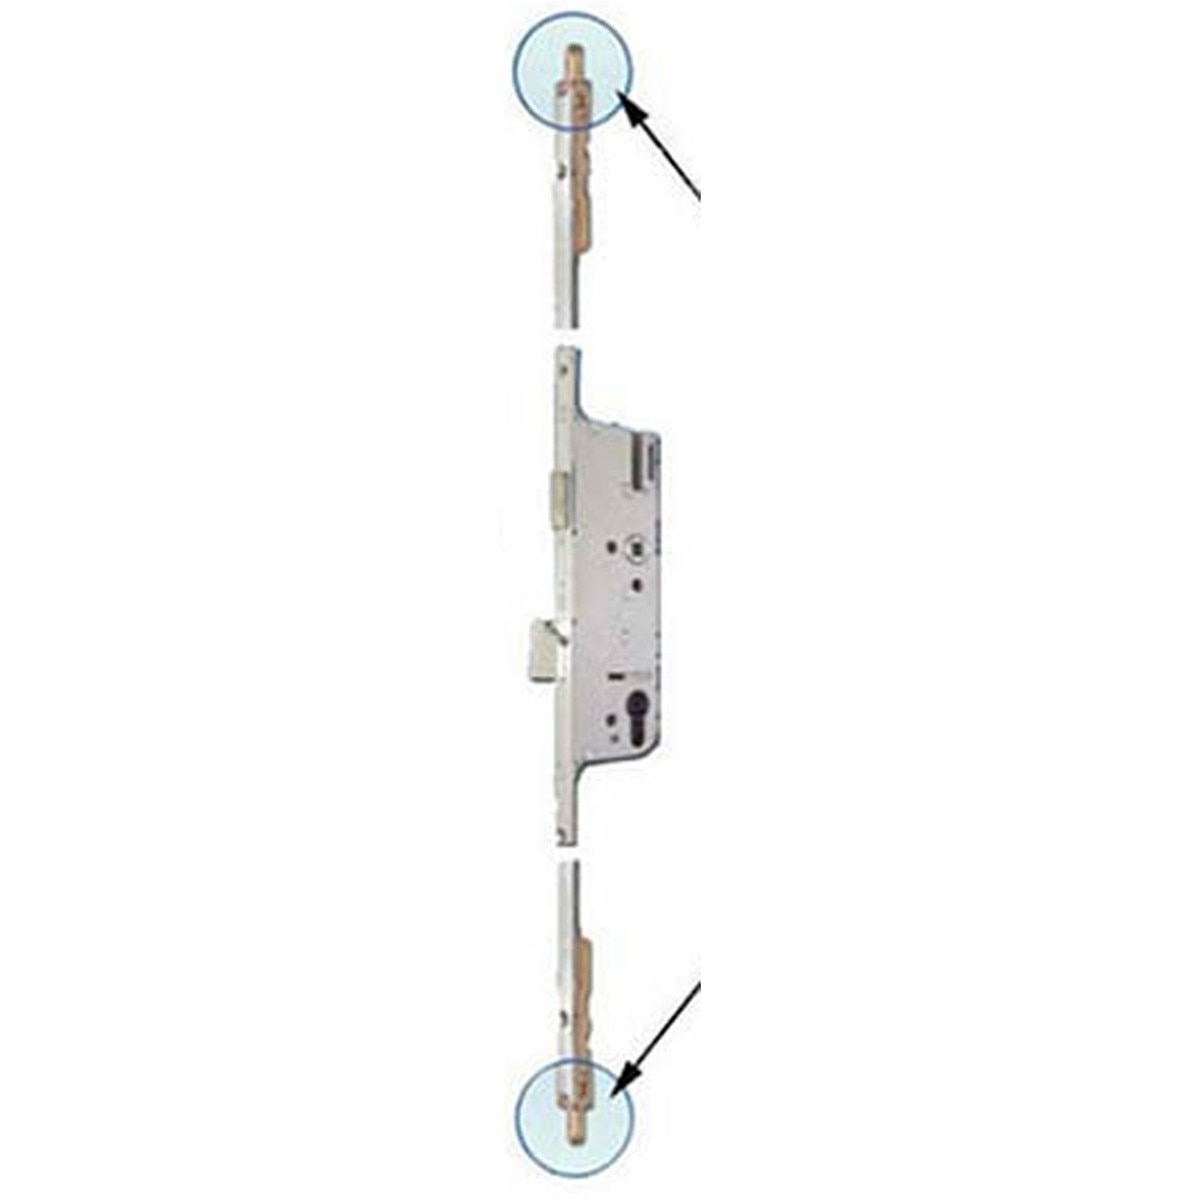
Active Pella / G-U 3-point Multipoint Lock Kit w/ Shootbolts 50/92
INSTALLATION NOTES:
- Minor modifications may be required.
- Shootbolt Version - Replacement Hardware for Active Door only
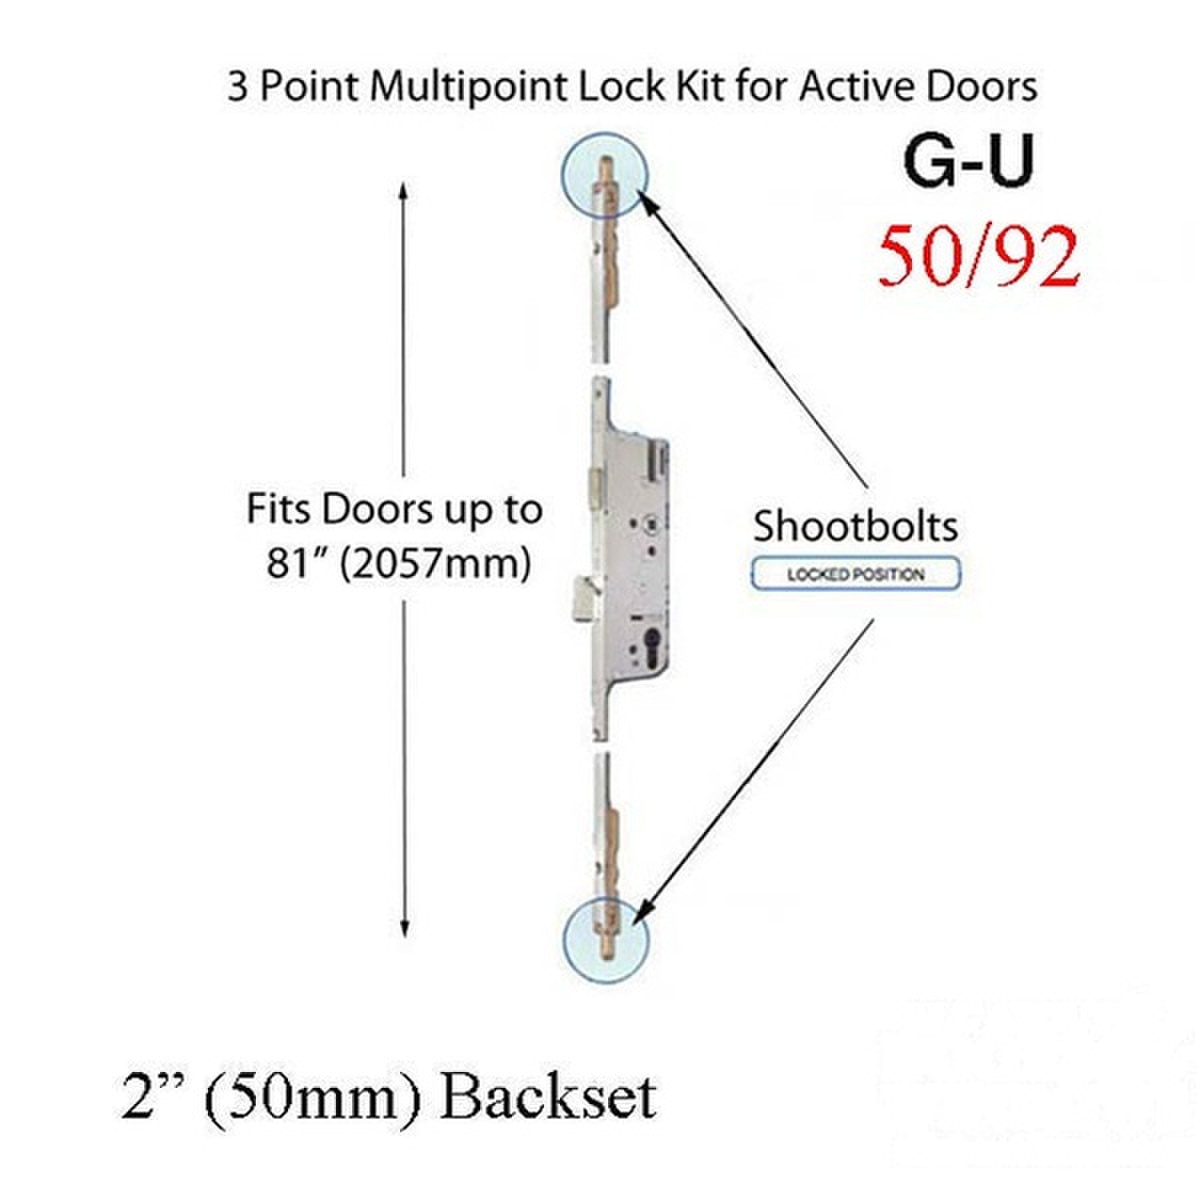
- This is a 2 piece, 3-Point lock with 50/92 Multipoint Lock configuration.
- Includes Top and Bottom Shoot Bolts will fit doors up to 81 inches (2057mm)
- Extension Available for taller doors.

Specifications:
- Overall Gear Length: 74-3/4 inches (1900mm)
- Overall shootbolt Extension Length: 6-3/4 (160mm)
- Gear is Crop-able for shorter heights
- Face Plate Width: 5/8 inch (16mm)
- Backset: 2 inch (50mm)
- Handle Spacing: 3-5/8 inches (92mm)
- Handle Spindle: 5/16 (8mm)
- Handle Height: 35 inches (889mm)
- Available Colors: Silver Ferguard, Black or Stainless Steel


NOTE 1: This Lock Case uses a Standard 5-Pin keyed American Lock Cylinder.
This is a KIT that includes, gear, top and bottom shoot bolts.
You will be able to reuse your handles / trim.
NOTE 2 : Replacement doors may be different heights - minor modifications required.
If Door panel height: 77-1/4 inch; remove 4 inches from new one when in unlocked position.
Replacement latch and deadbolt are in slightly different positions.
File hole in bottom of strike 1/8-3/8 inch on both latch and deadbolt, we do not recommend moving strike, better to enlarge the hole.
RELATED PELLA REPLACEMENT PARTS:
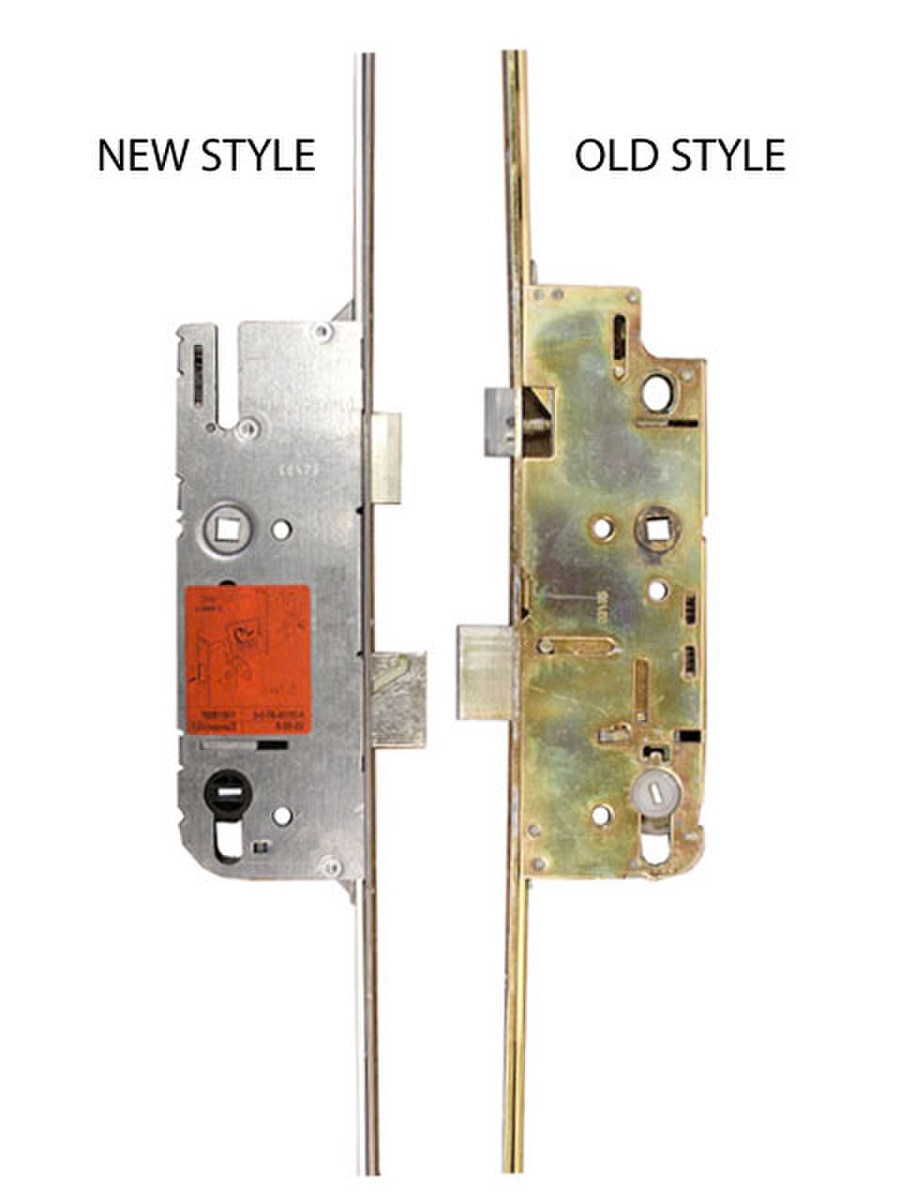
4990330-KIT - Shootbolt Kit Pella 50/92 Cremona - Complete Lock
40325 - Middle Extension only, Doors over 81 inches
G-16798-00-0 - Top Shootbolt Tip only
Articles:
Replacing Multipoint Lock in Pella Door
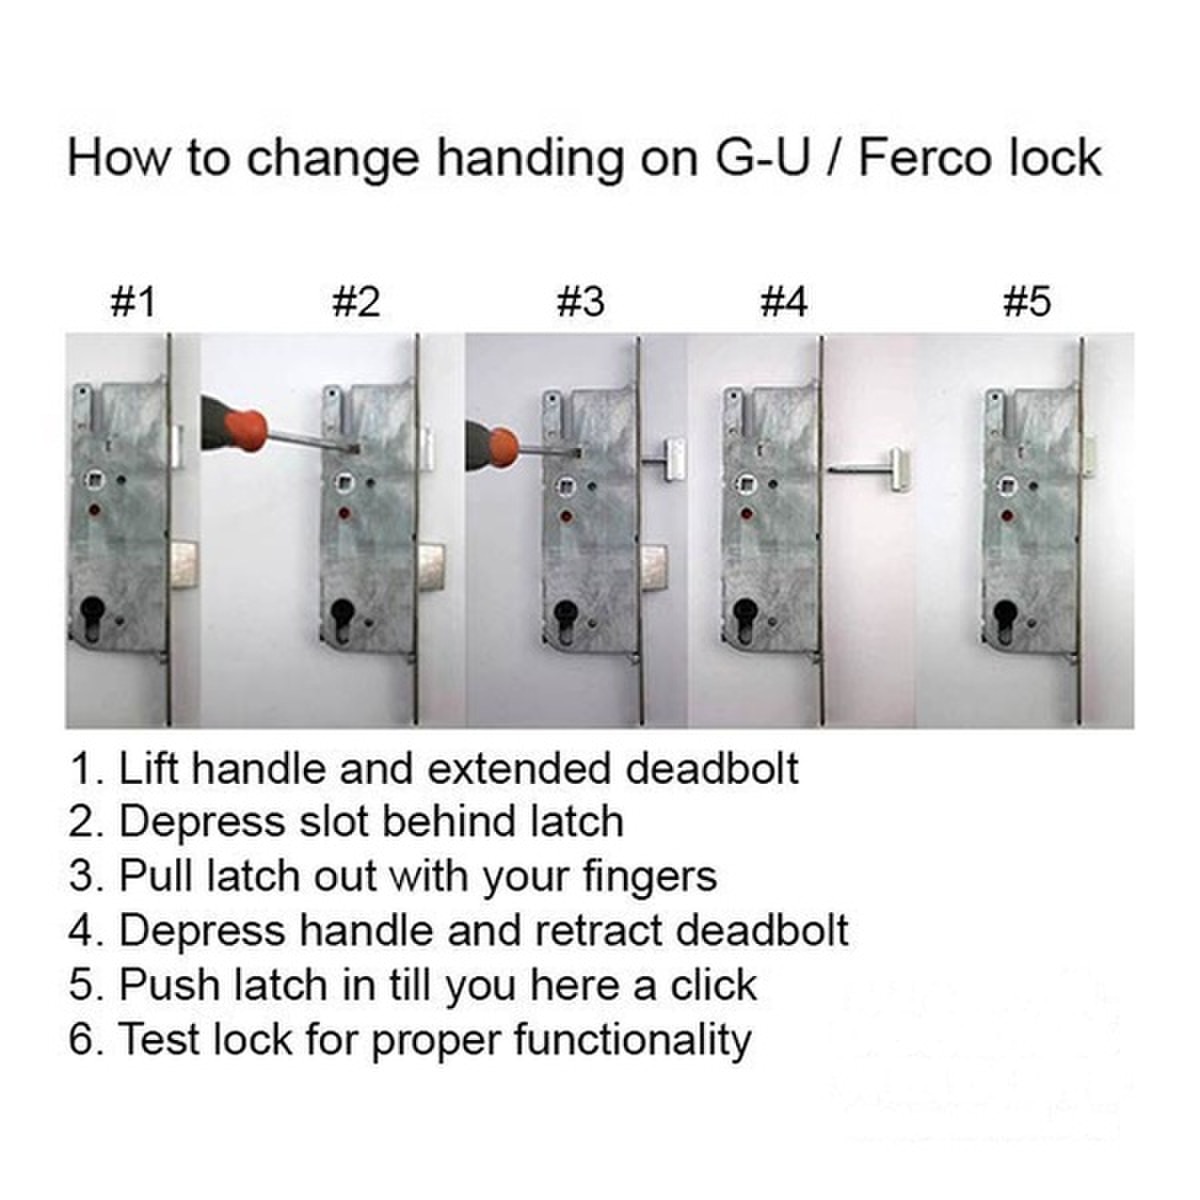
How to rehand GU-Ferco multipoint lock (change direction of springlatch)


VIdeos

Step-By-Step Instructions:
- Know that the backset is the distance from the edge of the door to the center of the hardware hole.
- With a faceplate: measure from the edge of the door or faceplate to the center of the hardware hole. (Example: 2-3/4".)
- European-style multipoint lock (open hardware hole): measure from the faceplate to the center of the hardware hole. (Example: 60 mm.)
- Do not measure backset on an American-style lock with no faceplate — the reading will not be accurate.
- If no hardware hole is visible: measure from the edge of the door to the center of the mechanism where the hole would be. (Example: 2-3/8".)
- Patio door with extruded astragal: measure the same as the opposite door — from the faceplate to the center of the hardware hole.
- Keyed / cylinder style: measure from the edge of the door to the center of the hardware hole or lock cylinder. (Example: 2".)
- Storm door with a lip: measure from where the door edge would be if the lip were not there, to the center of the hardware hole. (Example: 7/8".)
- Door with no mechanism installed: measure from the edge of the door to the center of the mechanism hole. (Example: 2-3/4".)

Step-By-Step Instructions:
- Retract the deadbolt fully into the lock. You cannot rehand the latch while the deadbolt is engaged.
- Fit a flathead screwdriver (or other thin flat tool) into the indent next to the latch.
- Press into the indent to release the latch, then pull the latch out of the lock case.
- Flip the latch to the orientation that matches your door swing.
- Press the latch back in until you hear a click and it is fully seated.
- Test the lock by hand before installing it back in the door.