How to Adjust a Spiral Balance Rod
Steps to Adjusting Spiral Balances in Tilt Windows
- Tilt the sash open and downwards, without removing it from the window. You should now be able to see the balance and tilt shoe in the jamb of the window.
- With the balance adjustment tool, latch onto the balance rod within the tilt shoe. Carefully rotate it a little to the right while pulling down. Then pull it out towards you to clear the shoe. Do not let go of or disengage the adjustment tool from the balance rod. The rod is still under the tension of the weight of the window.

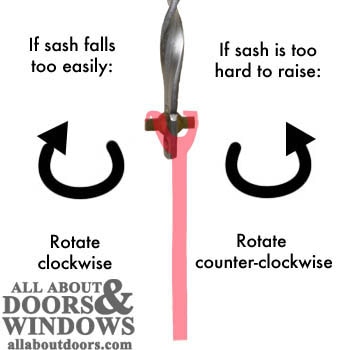
- Using your adjustment tool, rotate the rod to adjust the tension. Keep track of how many turns you make and in which direction, because you'll need to do the same thing to the other side. It's best to make one or two turns at a time. A little turn goes a long way, and the tension of a 20 lb. window isn't something you want to play with.
- Once you've adjusted the balances on both sides, replace the balance rod within the shoe, place the window back up in its normal position, and test raising and lowering the window. Readjust further if you need to.
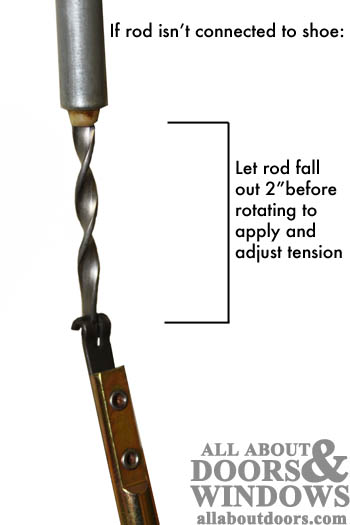
Note: If installing new balances that are not already under tension, you will need to put tension on them. The process is the same once you get the balances in and “started” under tension. To get the tension started, let the balance “fall” out of its tube so that there are about 2” of visible balance rod. Now, using the adjustment tool, latch onto the hooks on the end of the balance rod and adjust the tension as done in step 3 and 4. To get it started, you may have to do more than one or two turns, but never do more than four turns at one time.
Also available: Video on How to Install a Spiral Balance in a Tilt Window