Replacing Roto Multipoint Lock with Hoppe
Replacing Roto Multipoint Lock with Hoppe
Replacing Old Roto Lock with New HOPPE Hardware
This article will explain how to change a Roto multipoint lock with 13-3/8 faceplate to a HOPPE lock -- This is the recommended conversion when changing a Roto roller or tongue version to a HOPPE tongue version when the discontinued Roto is not available.
Note: the replacement process is the same for the Roto roller and Roto tongue, although the locks function differently. The replacement parts are different for locks on 8-foot doors and locks on 6-8 foot doors. The difference between the replacement locks are the location of the top and bottom tongues. Make sure you order the correct part number as listed below:
- To go from an 8-foot Roto roller or tongue lock (499090199 and 499091699) to a HOPPE tongue lock, order part #4990220
- To go from Roto roller or tongue lock for 6-foot 8-inch doors (499090099 and 499091599) to a HOPPE tongue lock, order part #4990219
Please read entire article before attempting to replace lock.
Remove Old Roto Hardware:
- Remove keyed cylinder, handles and trim plates.
- Remove all screws from edge of door faceplate.
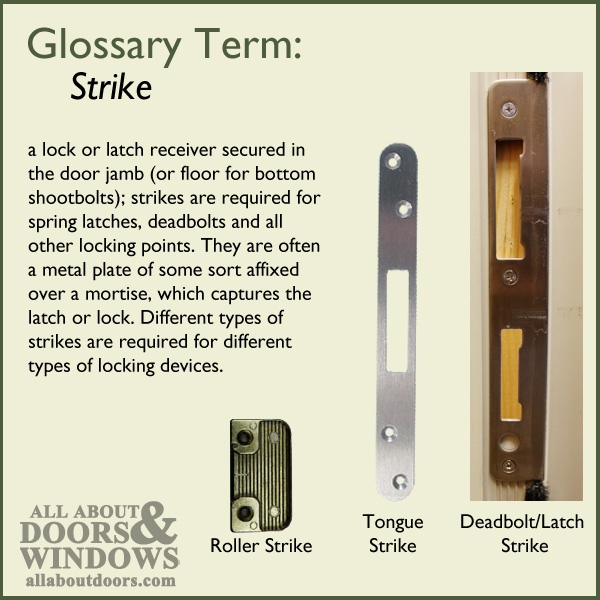
- Remove the two roller strike plates from door jamb.
- The latch and deadbolt strike can be removed or remain in place at this time.
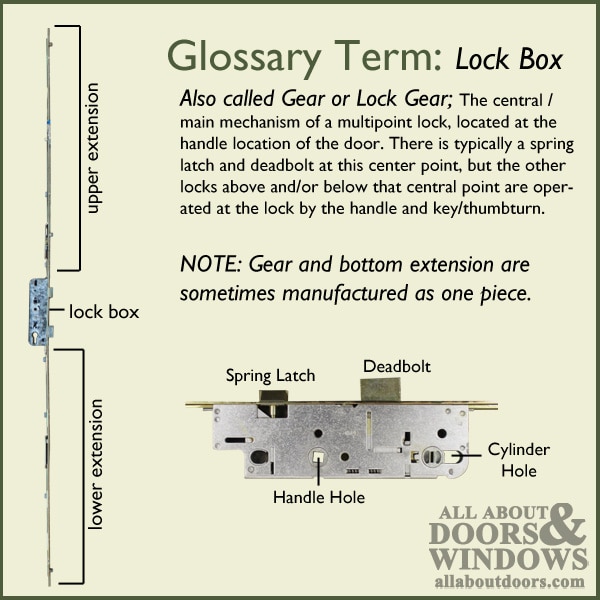
Install New HOPPE Hardware - Bottom Gear
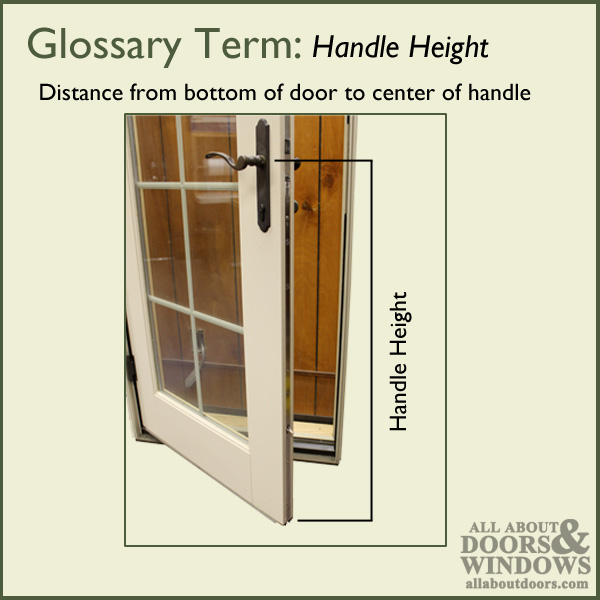
- Install bottom gear, be sure the face seats properly into groove. A block of wood can be used to seal the faceplate by gently tapping a measured out piece into the extra gap leftover in the mortise. In some cases, it might be necessary to use a razor knife or chisel to remove excess wood. The handle height should be at 36 inches and the bottom of the faceplate flush with the door -- if faceplate is too long, trim as needed.
- Install stainless steel screws; do not over-tighten.
- Reinstall the trim plates and handles; be sure everything lines up properly before installing two screws to secure lock in place. DO NOT over tighten, just make snug. If changing interior and exterior handle trim, the screw holes may need to be re-drilled.
- Close door and, with a pencil, mark the jamb where the spring latch and deadbolt will strike jamb plate. It might be necessary to drill the hole deeper so the replacement lock will engage properly.
- Note: The HOPPE deadbolt should fit back into the same hole as the Roto. However, the spring latch is off approximately 3/4". The best solution is to remove strike plate and enlarge hole.


- After marking the spring latch position, remove latch/deadbolt strike and use hack saw to cut away the excess material.


- Locate proper position for new tongue strike plate and screw into place. Using a razor knife, trace around strike jamb. Remove strike and mortise the thickness of the plate so it will be flush with the wood jamb.
- Reinstall the latch/deadbolt strike, then the bottom tongue strike; check function of new lock. The bottom tongue should lock in the center of the strike, and the spring latch excess should hold the door shut. Extend deadbolt; if deadbolt drags on the strike plate, file off excess as needed. If not sure which side to file, push door in and check locking of deadbolt, then pull door out and check; this will let you know which edge needs to be filed.
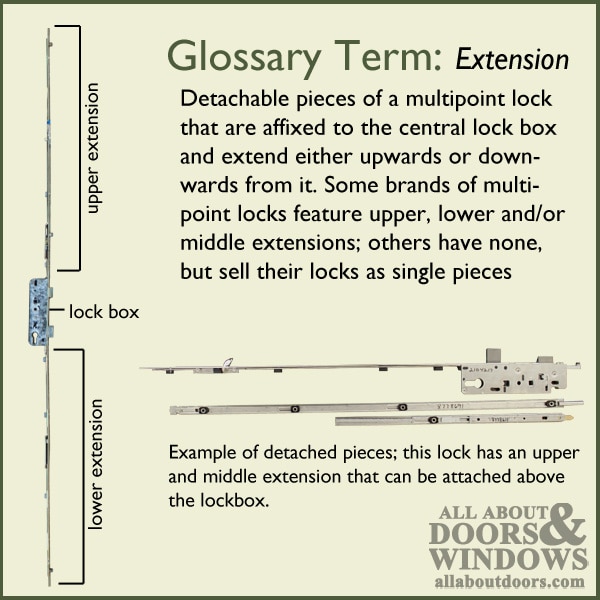
Install New Hardware - Top Extension
- Place the top extension in place and mark at the top edge of door; the excess will be cut off.
- Install top extension with a couple of screws; be sure it fits snug into groove.
- Close door and mark the location of the tongue.
- Repeat same procedure for bottom tongue strike plate (see above).
- Close door and check operation of new lock.
- If everything functions properly, install remainder of stainless steel screws; do not over-tighten, just snug.
Additional information on multipoint locks available on request.
Multipoint locks are easy to work on when you have the proper information.
We have new trim with high performance finishes if you want to upgrade your handle/trim.