Andersen Casement Window Operator Replacement
How to replace an Andersen window crank
Please read all instructions before attempting to replace your Andersen window crank.
The following article applies specifically to Andersen primed wood casement windows made by Andersen from 1932-1989. The crank operators have changed over the years and the wood sills might be slightly different but the basics are the same for changing all Andersen primed wood window crank operators.
Andersen primed wood casement through 1988:
1936-1974 Anderson primed wood casement used a straight arm operator with a metal base.
1974-79 Andersen switched to a plastic snap on cover that did not have screw holes.
1979-1988, Plastic cover had 2 additional screw holes. The Anderson prime wood casement window has been discontinued. However, most parts are available.
Note: Stained or painted windows may require cutting paint lines with razor knife to prevent damage to paint or stain on surrounding wood surfaces.
How to Replace an Andersen Casement Window Operator
Start by cranking the window open.
Please be aware of the weather - blowing winds can catch the window sash and break your glass or worse.
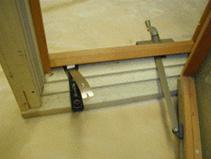
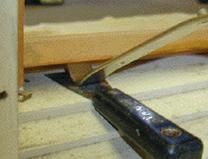
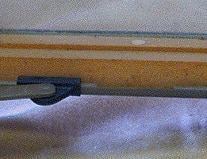
From the outside, pry gently on the underside of the sill cover. Most painted surfaces require using a sharp razor knife to cut the paint or caulk lines. Score the surface area lightly to separate the sill cover from the sill.
If you can't tell where the two surfaces separate, apply a small amount of pressure to the underside of the sill cover and you will see a small stress crack where the two meet.
Use a flat putty knife under the pry bar to prevent marring the wood.
Take your time - don't hurry.
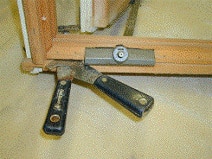
Be sure and work the sill cover loose all the way across before trying to remove. The wood sill cover is thinner where it covers the crank / operator.
If you apply to much pressure at anytime, you risk the chance of damaging or breaking the sill cover. The wood becomes dry and brittle over time and can easily split or break.
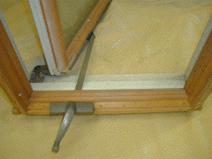
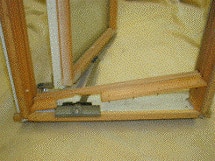
Remove the operator shoe from the track located on the sash.
There is a notch in the center of the track which allows easy removal and reconnection of the nylon shoe. After the new operator is installed, a light coat of silicone spray will help the nylon shoe glide.
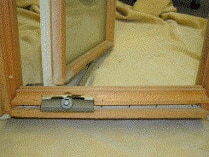
This example is an older window and the plastic cover does not have screw holes. If you order a new operator the new Andersen window crank replacements will have the current style with holes.
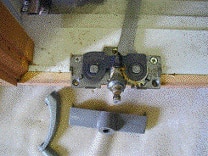
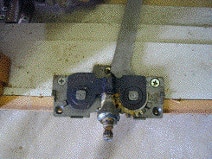
The old style operator cover does not always have to come off to remove the operator. However, there might be screws under the cover that can not be seen. The new style has 2 holes in cover for screws. The additional 2 screws add stability for the operator.
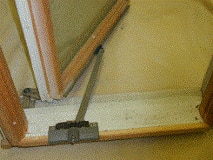
Remove screws and replace operator using same holes.
Installing the Replacement Andersen Operator
Reverse the process to install the replacement Andersen window crank.
After the replacement Andersen window crank is installed, reinstall the wood sill cover. When reinstalling the wood sill cover pull the nails through. Do not try and use a hammer and beat them back the other direction, this will normally split the hole around the nail.
Gently work the sill cover back into place and install 2-3 finish nails to retain it.
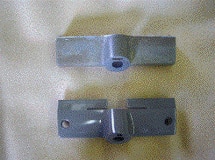
Replacement Hardware and Parts:
Andersen Window Crank (LH): 0565616
Andersen Window Crank (RH): 565620
Andersen Window Operator (LH): 1361308
Andersen Window Operator (RH): 1361310
Andersen Window Crank Handle: 532408
Andersen Window Operator Cover: 532610

Products Related To This Article:
<%=getAttribute('item',61215,'itemid','')%>
<%=getAttribute('item',61215,'storedisplayname2')%>
<%=getAttribute('item',61220,'itemid','')%>
<%=getAttribute('item',61220,'storedisplayname2')%>
<%=getAttribute('item',61905,'itemid','')%>
<%=getAttribute('item',61905,'storedisplayname2')%>
<%=getAttribute('item',64470,'itemid','')%>
<%=getAttribute('item',64470,'storedisplayname2')%>
<%=getAttribute('item',61219,'itemid','')%>
<%=getAttribute('item',61219,'storedisplayname2')%>
<%=getAttribute('item',61824,'itemid','')%>