Replacing Multipoint Locks in Weather Shield Doors Manufactured Prior to 2004
Replacing Multipoint Locks in Weather Shield Doors Manufactured Prior to 2004
Weather Shield manufactures and sells doors and windows, but like many large companies, they use pre-fabricated components in their final products. Weather Shield currently uses multipoint locks manufactured by a company called HOPPE. However, up until around 2002, different Weather Shield door product lines were manufactured using locks made by other companies, namely Roto and WINKHAUS.
Both Roto and WINKHAUS have stopped working with Weather Shield, and these locks are no longer available. As these doors age, the locks are beginning to wear out and break, and direct replacement locks cannot be manufactured. As an alternative to completely replacing your door, we offer custom replacement locks made by HOPPE that are relatively easy to install if you have some basic carpentry knowledge.
How To Replace a Lock in a Weather Shield Door
To our knowledge, the 5 roller locks in the table below were used in the following Weather Shield product lines:
- Weather Shield (manufactured prior to March 2002)
- ProShield (prior to Aug. 2004)
- Visions (prior to Feb. 2004)
| Discontinued Multipoint Lock in Weathershield Door | HOPPE Replacement Lock (Roller Version) |
|---|---|
| A)499117699: 4-point* lock made by WINKHAUS: 3 rollers (top-most roller = 47 ½" above handle) | 4991176 |
| B)499090199: 3-point lock made by Roto: 2 rollers (top roller = 47" above handle) | 4991176 |
| C)499090099: 3-point lock made by Roto: 2 rollers (top roller = 32 ½" above handle) | 4990917 |
| D)499117599: 5-point lock made by WINKHAUS: 2 rollers and shootbolts at top and bottom (top roller = 33 ½" above handle) | 4991175 |
| E)499110099: 3-point lock made by WINKHAUS: 2 rollers (top roller = 32 ½" above handle) | 4990917 |
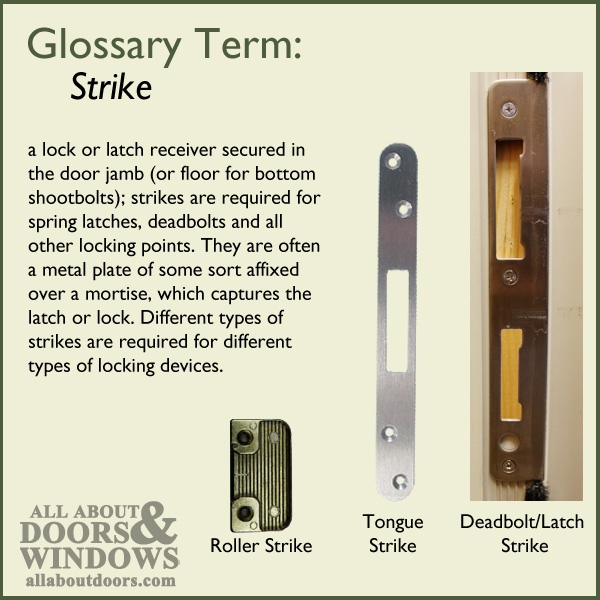
Note: Spring latch and deadbolt at center handle count as 1 point; roller locations are approximate because rollers are movable and may be stuck or measured at slightly different points.
The replacement locks in the chart above and used in this tutorial are all roller-style locks, the same as the original locks used in your Weather Shield door. Your locks can alternatively be replaced with tongue-version locks (shootbolt-only for lock D) as well. For instructions on how to do so, please click here.
- Use a pencil to mark height of handle and alignment line on edge of door panel before removing lock. New lock has to be at same handle height for rollers to line up with jamb-side strikes.

- Loosen set screws on base of handles, and remove handles.
- Remove interior/exterior escutcheon plates.
- Unscrew cylinder screw on door edge (where latch is located), and remove cylinder.
- Lock runs entire length of vertical edge of door. Remove all screws.
- Remove the multipoint lock from the door edge.
- Connect the top extension (middle extension for lock D) of the new HOPPE lock to the bottom gear.
- Place new lock into mortise in door edge, making sure handle alignment line matches up to line drawn in step 1.
- For Locks B & C: Because the original Roto lockbox is bigger than the replacement lock, there may be remaining room in the mortise when installing the replacement lock. If you wish, you can screw a small block of wood into the mortise to fill the remaining gap; the top portion of the lock should cover it, however.
- Check the handing of your lock. Is the slope of the latch facing the jamb? If your lock is handed wrong, remove it, reverse the handing, and put it back in place.
- For locks A, B, C & E: (For lock D, go to step 11.)
- Measure from handle alignment line to top of door panel, and mark with permanent marker on the lock where it needs to be trimmed to fit in the door.
- Use a hacksaw to carefully trim the excess lock off. The lock will be hot after trimming and sharp at the rough edge. We recommend filing it to smooth it out.
- Move on to step 12.
- For lock D:
- Take the spindle and handle from the original hardware and insert it into the lockbox, turning it upwards to engage the locking points. Use your fingers to extend the shootbolt on the shootbolt extension.
- Take the unattached shootbolt extension and hold it so that the end of the rod (not the actual tip of the shootbolt) is flush with the top of the door. It will overlap the middle extension of the lock.
- Mark this spot on the lock with a permanent marker, double-check it by measuring it out using a tape measure.
- Trim this part off using a hacksaw. Be careful trimming, as lock will become and cut edge will be sharp. We recommend filing the edge smooth.

- Loosely screw the lock in place in the door. For Lock D, make sure the teeth of the shootbolt extension are lined up with the connector on the middle extension.
- Insert a handle and spindle in the handle hole to check lock operation while door is open. Note: new lock has a mishandling device (between deadbolt and spring latch), which must be pushed down in order to engage locking points. While door is open, push down with fingers.
- Reinstall escutcheon plates and handles.
- If door functions properly, unlock lock and install and tighten all screws running up and down length of faceplate.
- Adjust and move roller strikes as needed. Depending on the roller strikes were originally installed on your door frame, you may need to move the roller strikes up or down slightly in order for them to correctly connect with the rollers when the lock is engaged. Note: Always 'test' for correct strike location with the door open. Eyeball and measure carefully before installing and attempting to close the door or the door could become stuck in the locked position.
- Adjust the deadbolt strike as needed.
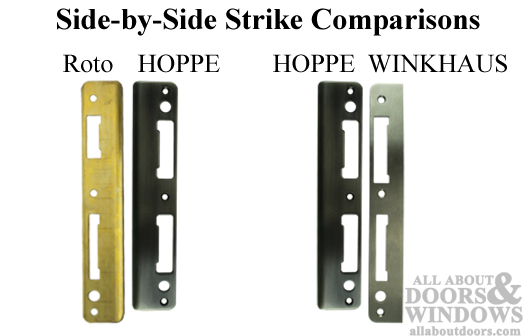
- Locks A, D & E: You should be able to reuse the original WINKHAUS deadbolt strike.
- Locks B & C: The deadbolt strike will most likely need to be replaced with a new HOPPE strikeplate. Use filler or extra wood to cover up the remaining mortise cut-out from the original strike.