How to Install Andersen Gliding Door Handleset and Lock
How to Install Andersen Gliding Door Handleset and Lock
How to Install Andersen Gliding Door Handleset and Lock
This article pertains to Andersen handlesets and locks on the following Andersen gliding doors.
- Andersen 200 Series Narroline Gliding
- Andersen 200 Series Perma-Shield Gliding
- Andersen 400 Series Frenchwood Gliding
The process for replacing and installing all of these Andersen gliding door handlesets and locks is the same. We will also demonstrate how to replace the lock.
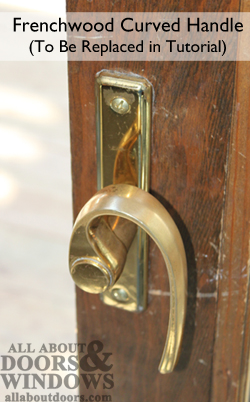
Our tutorial shows a French Curved handleset and lock being replaced with a Whitmore set.
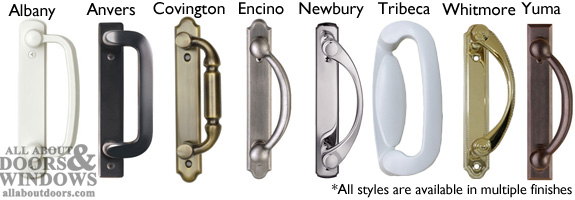
*Note: Exact dimensions of escutcheons and handles may differ from style to style, though all Andersen gliding door hardware has the same screw spacing and will install without drilling new holes.
*Note #2: There are two different styles of locks: old and new. Both feature an anti-slam device, which keeps the lock from engaging unless the door is closed, protecting the latch from being slammed and damaged. Both styles are the same dimensions and can be interchanged. Latch and latch receiver must match, otherwise lock will not work.

Steps to Replacing Lock
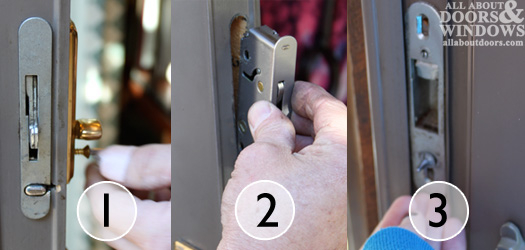
- Remove old thumbturn by unscrewing top and bottom screws and pulling out of door.
- Lift latch from edge of door and out of mortise.
- Unscrew latch receiver from door jamb and lift out of mortise.
- Slip replacement latch into empty mortise in door edge.
- Insert tailpiece of new thumbturn (or old one if just replacing lock) into hole on edge of door until you feel it slide all the way in.
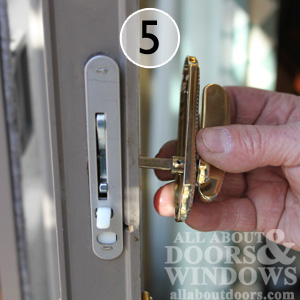
- Test operation of thumbturn and latch before screwing thumbturn in place. **Note: to test latch, the anti-slam device must be engaged; on new-style latches, plastic piece below latch must be depressed; on old-style, metal block under latch must be pushed in.

- Slip new latch receiver into place in door jamb and carefully slide door to determine if latch and receiver are correctly lined up.
- When lined up, screw latch receiver into place.
Steps to Replacing Handles and Coverplate
- Remove exterior and interior handles by unscrewing them from the interior side o the door. Depending on the handleset, there may be mounting studs now sitting loose in the exterior handle.
- To install new handleset, place mounting studs in exterior handle screw holes (if installing Tribeca handleset, there are no mounting studs). Handles should face glass of sliding panel so open side of handle faces latch.
- Thread bolts through interior handle. Tighten with screwdriver. Do not overtighten.
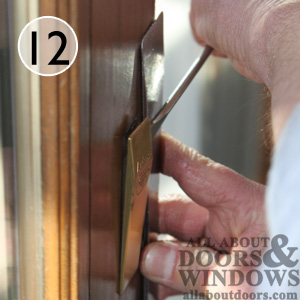
- Remove coverplate from opposite edge of sliding panel.
- If replacing a French Curved, Covington, Encino, Newbury or Yuma set, coverplate will be a plastic piece that pops into place. Pry it off using a screwdriver set on top of a flat pry bar to prevent damage to wood.
- If replacing a Whitmore, Anvers or Tribeca, unscrew coverplate using screwdriver.
- To install Whitmore, Anvers or Tribeca coverplate, use a screwdriver to install screws to secure coverplace in door. If installing Covington, Newbury, Encino or Yuma coverplate, hardware pops into place with no need for screws.
*Note: Guide written explaining process to replacing entire handleset and lock. We have full handlesets available with all pieces; we also sell individual handles for direct replacement, which do not include any other parts. Andersen gliding door hardware may also be purchased separately.
Andersen Gliding Door Hardware Associated With This Article:
Andersen handlesets
Andersen individual handles for sale
Old-style lock
New-style lock